Print sales offer a fantastic opportunity for distributors to stand out, provide comprehensive services to their clients, and significantly boost their bottom line. Incorporating print into your online company store programs can broaden the product selection and attract a wider buying audience. The best online store programs are indispensable tools for clients, serving numerous departments and end-buyers who need posters, sales literature, business cards, folders, and forms. Adding a print category can transform a simple 'company store' into a robust marketing and operations resource center.
In this post, you'll learn how to include print in your company stores, why
Liftoff is ideal for print programs, the role of suppliers like
BCSI, and how to integrate Liftoff with BCSI for efficient, automated sales.
The Ways Print Exists in Stores
Print products can take a few forms in your programs. Each with their own benefits and drawbacks.
Pre-Printed Inventory: This is the most straightforward method for including print products in your program. Pre-printed items are produced in bulk and stored for later release by your fulfillment team, managed like any other promotional or apparel item.
Printing in large quantities typically results in the lowest price per piece. These items can be released in small quantities and quickly received by customers when needed urgently. Suitable products for inventory include presentation folders, posters, or any high-usage items with stable artwork.
While easy to introduce, pre-printed inventory has drawbacks. It requires upfront costs, may need to be discarded if there are design changes or rebranding, and requires storage, which can add additional costs.
Static Print-on-Demand: Here the term 'static' refers to the artwork of a printed item that does not include areas of customization. This can include almost any printed product – sales sheets, posters, door hangers, table tents, etc. By 'Print-on-Demand' we simply mean the item is not on the shelf and ready to ship, but rather, upon ordering, the product is produced, often with a minimum order quantity requirement.
Customers may prefer print-on-demand because it does not require upfront costs or storage, reducing the risk of wasted inventory. This method allows you to offer a broader product catalog without the need to stock every item. However, customers must meet MOQ requirements and pay more for smaller quantities. They will also experience longer wait times as items are printed and shipped. Additionally, you will need efficient back-office processes to manage and account for these orders.
Variable Data Print-on-Demand (VDP): These customizable items (e.g., business cards) are printed on demand, providing value through personalization. The pros and cons are similar to static print-on-demand but require an e-commerce platform capable of handling customization.
How Liftoff Helps Sell Print
There are two ways that Liftoff aids in building successful print programs. First, Liftoff supports Pageflex, which allows for the creation of customizable print designs. A Pageflex template lets customers personalize items online, generating the final production artwork for printing.
Liftoff can automatically send order details and artwork to integrated suppliers like BCSI, who handle printing, shipping, and updating the tracking in Liftoff.
Integrating Liftoff with BCSI
BCSI provides a range of printed products to distributors, including business cards, flyers, brochures, envelopes, and rack cards.
Assuming you’ve already worked with your client and BCSI to spec out and price a product, like a sales sheet, we will now guide you through configuring the BCSI integration in Liftoff. We will also demonstrate how to configure a product in Liftoff, using both a static design (non-customizable) and a VDP design (customizable) as examples.
Liftoff allows you to set up vendors at the account (store) level or the subscriber level. This means the vendor is available either exclusively to the account you set it up under or globally, to all accounts. Which you set up is largely up to you and can be based on how your company and operations are structured. That said, whether you set up an account vendor or subscriber vendor, the process is largely the same. For this example, we'll set up an account-level vendor by navigating to our account and then Products > Vendors and clicking on the blue Add Vendor button.
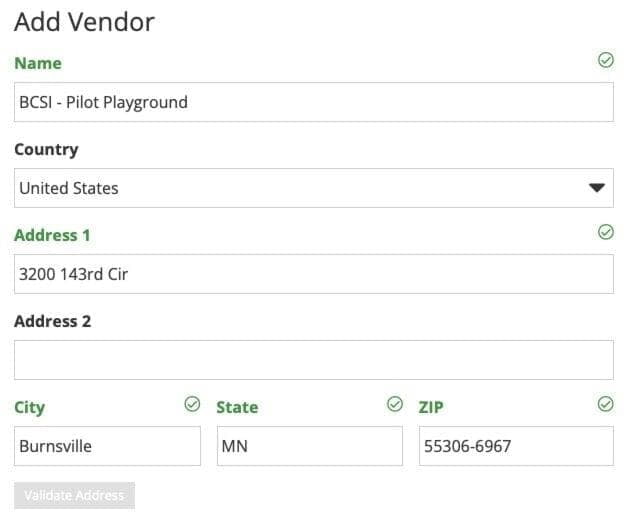
This provides you with a brief form to fill out. Again, how you use Liftoff and operate your company will determine how much of this form you fill out. But at the very least, you must provide the vendor name and Address. What name you provide the vendor is up to you, but I like to include the vendor's name and then an indication of what account the vendor is servicing. Here's how I'd set up a BCSI integration for an account called Pilot Playground.
When you click the
Save button, the page will reload with a number of new tabs. We won't go through each of these, but if you're curious, the
Liftoff documentation is a helpful reference.
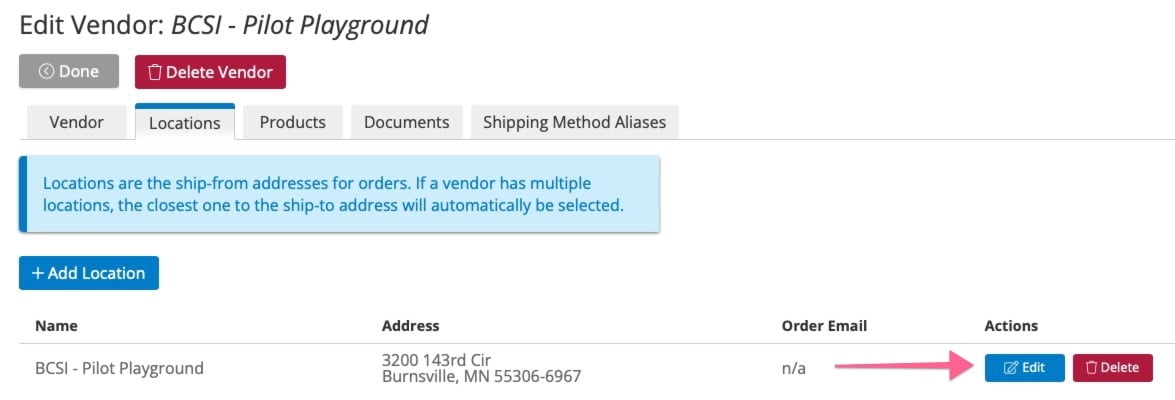
We will concern ourselves with the Locations tab, though. If you click it, you will find that the address you provided in the previous step has been used to create the vendor's first location. You can think of these locations as the vendor's distribution centers. Click the blue Edit button next to the location that has been set up already.
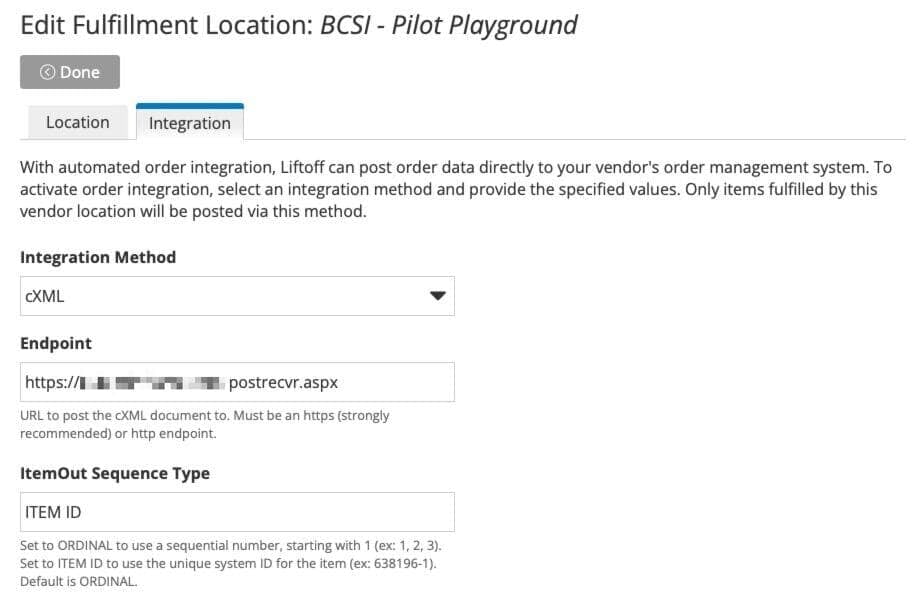
You will now see a new tab called Integration. It's important to remember that each location has its own discreet integration so if you're ever setting up a vendor with multiple locations, you should keep that in mind. For now, select cXML as your integration method. The page will populate with a bunch of new fields. Not all of these are required but Endpoint is particularly important. The endpoint is a supplier web address where the order information will be sent to when a product, configured with this vendor, is placed. At this point, you'll want to work with your BCSI rep to confirm the details for filling this form out, but you should expect to receive a URL for the Endpoint field at the very least.
By now, we're almost done with our initial setup. The last task is to set up a fulfillment workflow. Each product in Liftoff is assigned a fulfillment workflow. This workflow instructs Liftoff on how to handle the product once an order is placed for it. We want to create a workflow that, upon order, will send the order and product data to BCSI through our newly configured integration. Do this by navigating to Products > Fulfillment Workflows. Then click the green Add Workflow button. You are then asked to provide a name for your workflow. I like to name this in such a way that team members coming behind me can intuit what the workflow is for, in this case, printed items from BCSI.
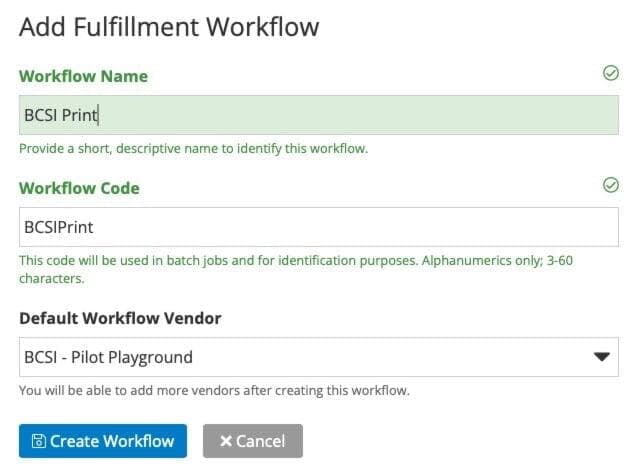
The Workflow Code, used in future batch jobs, is defined for you. Select your new vendor as the default and click the blue Create Workflow button. Congratulations! Doing so will take you to a page where you can configure some additional options. For now, though, you can leave these at their defaults. You now have everything in place to start configuring products to send to BCSI for fulfillment.
Product Setup
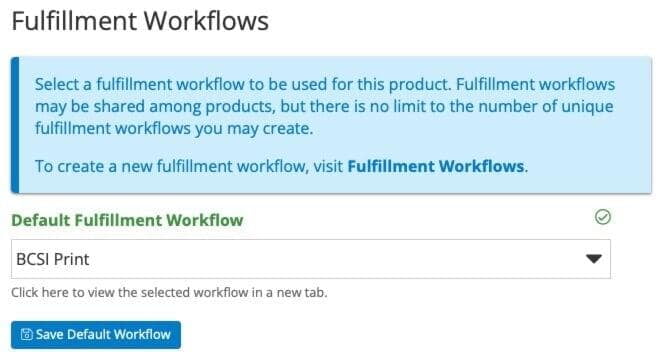
Now that your vendor and fulfillment workflow is created, it's time to configure your sales sheets product. We won't go through the entire product setup, only the parts important to your integration. First, in your product's Fulfillment tab, select the BCSI fulfillment workflow that you created as your default fulfillment workflow.
The next and final step to integrating this product with BCSI depends on what type of print product it is. If the product is a VDP product like a business card, you'll need a Pageflex template developed. We'll talk more about Pageflex in another post, but assuming a template has already been created and uploaded to Liftoff, you'll select it on the product's Specs tab. By assigning a Pageflex template to this product, when the design is customized by the end-buyer, along with the product data, BCSI will receive the print file that Pageflex generates for the order.

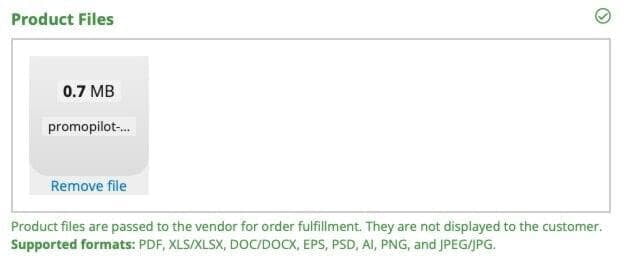
On the other hand, if your product has a static design, then you can simply upload your print-ready artwork file to the product's Product Files on the same Specs tab. This file will be sent to BCSI when an order is placed for this product and is what will be printed. Setting up a product in this manner can be convenient for items who occasionally have their design changed. For example, if your client provides you with new artwork for this sales sheet, all you need to do is upload the new print file here and update the product's images to reflect the new design. No need to develop a new Pageflex template in this case.
Good news! Your vendor integration with BCSI and product configuration is complete. As you add additional print items to your account, you'll only need to set the fulfillment workflow and either upload a product file or set the product template. Before you make your new product available for purchase,, work with your BCSI rep to set up the product on their end and put a test order through.
By following these steps, you can efficiently integrate BCSI with Liftoff, enhancing your online company store programs with valuable print products.