Zoho DataPrep is an intuitive data preparation tool designed to simplify the process of cleaning, transforming, and enriching data. For print and promo product distributors, DataPrep can import your data from various sources like CRMs, spreadsheets, databases, and even APIs – making data management much easier.
You can quickly remove duplicates, correct errors and handle missing values, saving time and ensuring data accuracy. For instance, distributors could use Zoho DataPrep to consolidate customer data from multiple platforms into a single clean data set, making it easier to track customer activity and trends across sales channels.
You can also transform and combine data to generate insightful reports or prepare imports into other platforms. By streamlining these processes, distributors can focus on growing their businesses rather than getting bogged down by data issues.
Zoho DataPrep has a free plan that you can use to get started with, and later upgrade if you need more power. If you'd like to try it, please use the button at the end of this article. It will support what we're doing at PromoPilot and you'll also get a $100 credit from Zoho that can be used for any of their apps.
Connecting Liftoff to Zoho DataPrep
As you begin to kick the tires on DataPrep, you can easily create datasets from any spreadsheets you have or by using any of their 50+ native connections. But DataPrep has a powerful feature worth exploring. With its URL connector, you can bring in data from any of your SaaS tools that have an API. To demonstrate this, let's review the process for getting Liftoff Commerce order data into DataPrep.
Note: In this brief tutorial you'll encounter some concepts related to APIs that we won't go in depth on. My goal is to get you seeing Liftoff data in DataPrep as quickly as possible. I'll show you where to click and what to put into each field to get started, but I highly recommend that you explore topics like JSON, API basics like call methods, parameters, and headers. Working with APIs does not require coding knowledge but it will elevate your no-code work tremendously!
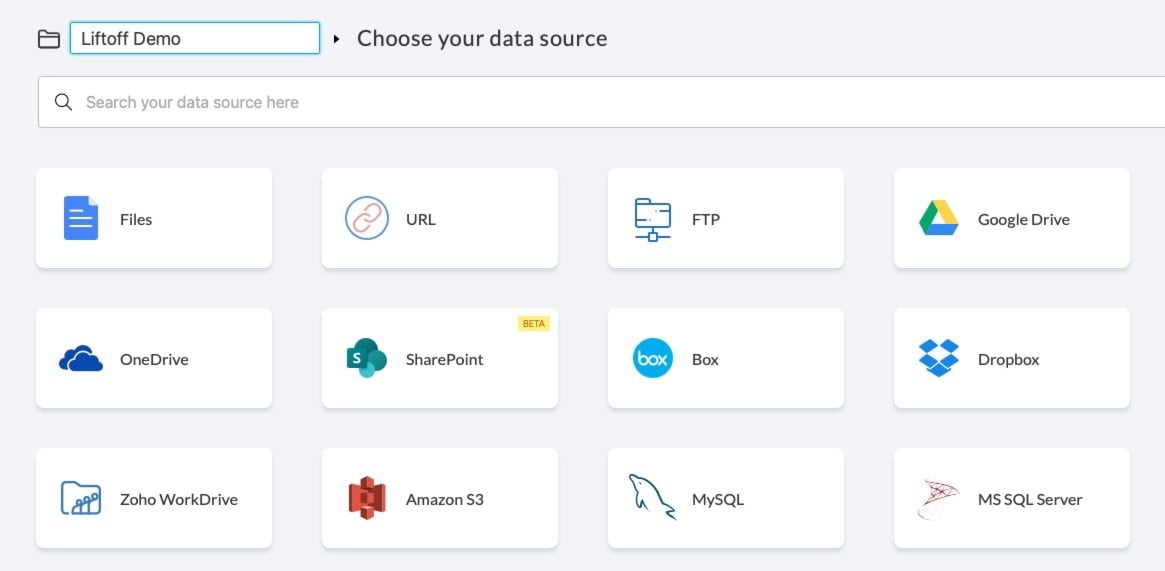
When you first log into DataPrep, you're going to be asked to create a workspace. Workspaces hold the various datasets and rulesets imported into Zoho DataPrep.
Give your new workspace a name and then choose a data source – for connecting to the Liftoff Commerce API, we'll choose URL.
Configure the Dataset
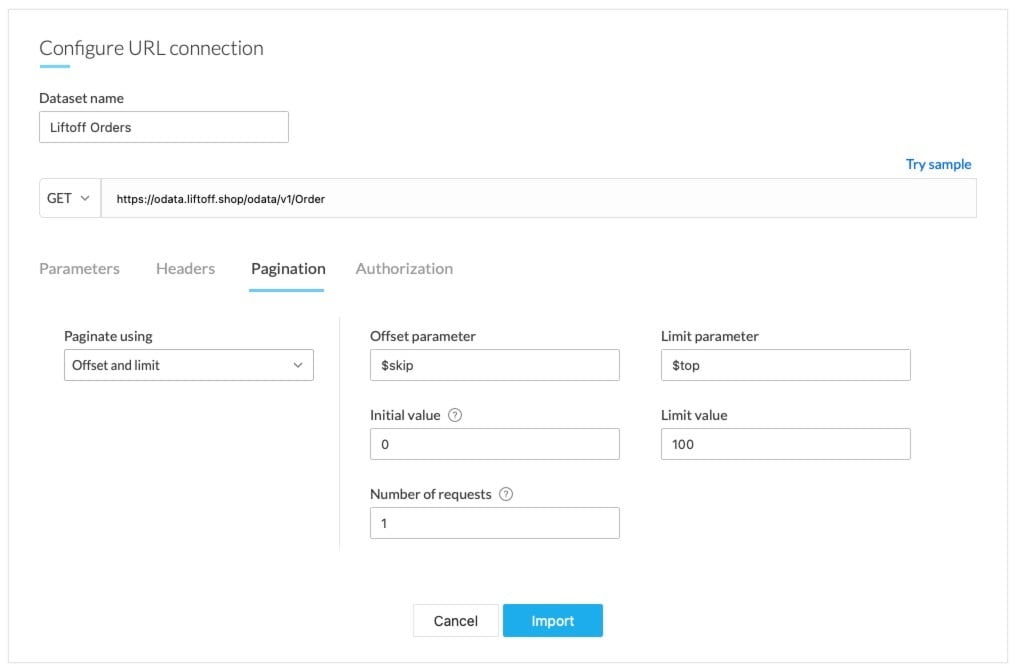
On the connection configuration screen you are asked to provide the dataset with a name. Call it what you please – but because any Liftoff API connection is tied to a specific account (store) I recommend naming it something like "ACCOUNT_NAME Liftoff Orders" using your own account name.
Next, define your method as GET and, for Liftoff orders, we use the endpoint at https://odata.liftoff.shop/odata/v1/Order. For more information on the Liftoff Commerce API and this endpoint, visit the Liftoff Commerce developer documentation site.
Click on the Pagination. Pagination in APIs refers to the process of dividing a large set of data into discrete pages to be retrieved sequentially or based on specific criteria, improving efficiency and manageability. The Liftoff API has a maximum limit of 100 items that it can respond to your API call with. So if you have 300 orders, you would need to make 3 requests. There are a few ways different APIs can handle pagination. For Liftoff we need to configure this screen like so:
We'll only make 1 request for now, retrieving up to 100 orders. Your Pagination configuration page should now look like this:Paginate using: Offset and limitOffset parameter: $skipLimit parameter: $topInitial value: 0Limit value: 100Number of requests: 1
The last step to configure our connection is to provide authorization details. Accessing an API is just like accessing any of your applications. For that reason we need something like a username and password. Like pagination, APIs can use a number of methods for authorization.
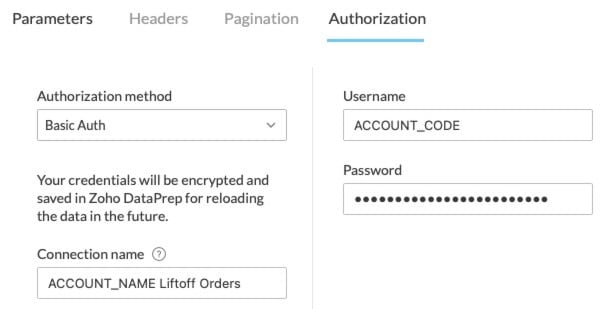
Click on Authorization and choose Basic Auth as your authorization method. Provide your connection with a name – again, I like to note the account, app, and what kind of data I am retrieving. Connections are saved by DataPrep and can be used again when configuring new data sources.
For the Username, you will use your Liftoff account code for the store you wish to receive order data from. Your password will be your admin user's API key. Both of these can be found in the Liftoff Commerce admin interface. Note: The API key for the admin user must have the right permissions to retrieve the desired data from the account you are retrieving from.
Your Authorization screen should look like the image below. Click the blue Import button to retrieve your data.
Transforming Your Data
You should now have a table of data. Nice! But – it doesn't look very useful. However, if we look at the data in the second column, we can see bits of order data. We need to transform this data into something that looks more like an order report.
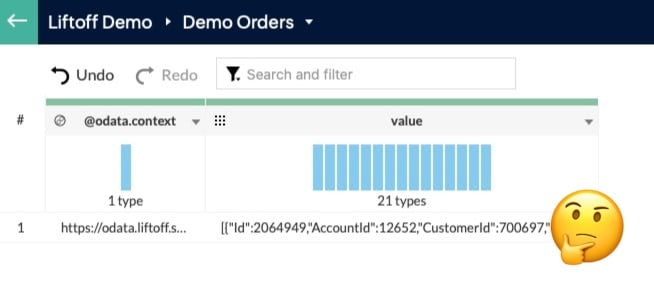
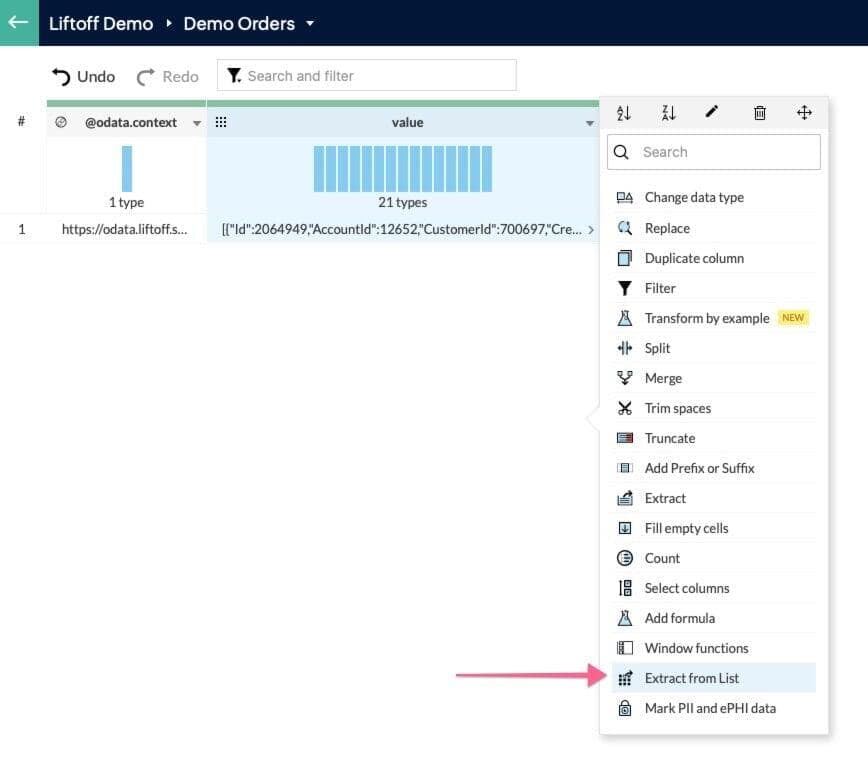
On the right side of each column header, there is a small down arrow. If you click this arrow, you'll be provided with a menu of the many transforms that you can perform in DataPrep. All of our order data is here in this one column on this one row – we need to first get each order's data onto its own row. Click the arrow in the value column header and choose Extract from List.
When you choose Extract from List, on the right sidebar, you'll be asked to convert the list items to columns or rows. Select Rows, and give the new column a name like 'Data.' You'll notice on the left side of the screen that DataPrep shows you a preview of your transform and it's beginning to look more like what we expected! Each order's data on its own row. But that Data column still looks weird. The data we want is there, we just need it on their own columns.
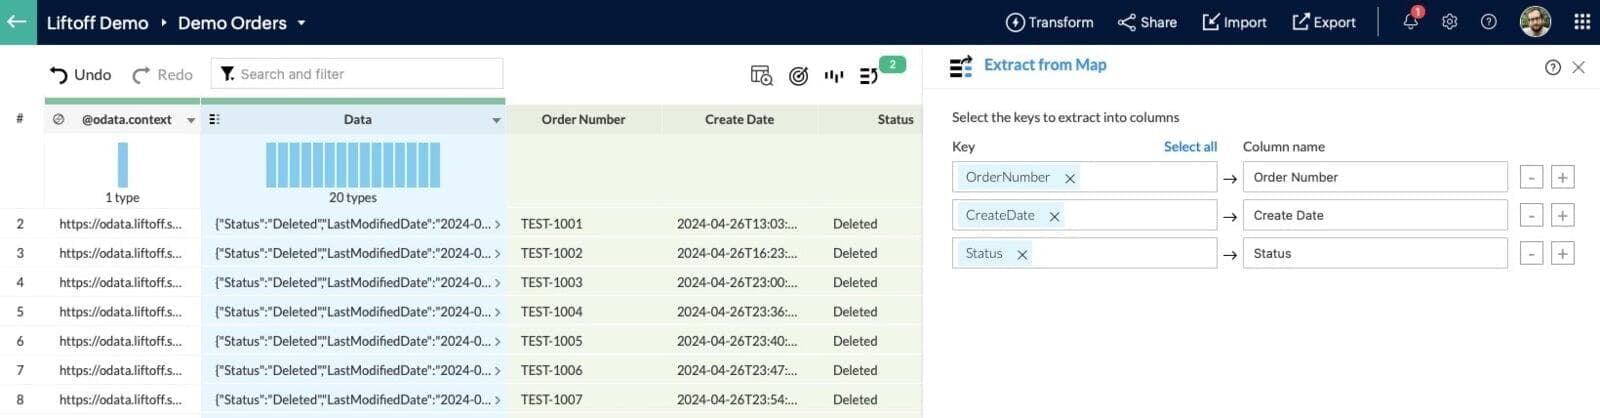
Navigate again to the transform menu of our new Data column and choose Extract from Map. In the right sidebar you are asked to select the keys to move into columns. In our Data column you may have noticed text like "Status":"Shipped". Status is the key and Shipped is the value. All of the properties for each order are in the Data column like this. To extract them, in the Key column of the sidebar, you can click into the text field and DataPrep will provide you with a list of available keys to choose from. Once you select one, you can give the resulting new column a name, click the + icon and continue selecting keys this way. As you work, your screen will look like this:
It's worth pointing out that in order to extract the billing information for the order, we need to take an extra step when defining the keys for that data. This is because the billing values are nested in the data. If we were to look at the raw data for an order, it would look like this:
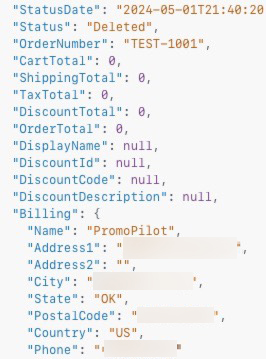
Notice that for the billing information we have keys like Name, Address1, Address2, etc. under Billing. As a result, if we want columns for that billing information, when selecting the keys for that billing data we will first choose Billing from the drop down. DataPrep automatically recognizes that there are additional keys under billing and so you can now choose which key, nested under Billing, you'd like to create a column for.

After you've selected all your keys and have the preview looking how you want it, click the blue Apply button.
From here there is any number of additional transforms you could perform like find and replace, changing date formats, etc. Many of the transforms you'll find are similar to what you would do in Excel.
Saving, Exporting, and Importing Rulesets
Now, we just did a bunch of work to get this Liftoff order data looking how we want it. The prospect of having to do this every time we want to bring in new order data is daunting. Fortunately DataPrep kept track of what we were doing all along as we built out our ruleset. This ruleset can be saved as a template, and even exported from one DataPrep account into another. This makes performing the same transforms on data that is imported in the same format fast and easy. In fact, I've exported my own ruleset for Liftoff orders and you can download it here.Conclusion
I hope that I've introduced you to a new tool that is helpful for the work you're doing at your print and promo company, and provided you with a jumpstart on how to get data into Zoho DataPrep so that you can explore all that it has to offer. If you don't use Liftoff Commerce, the same principals apply to any SaaS app with an API. Or, you can bring in Excel documents from other reports that you might have, and begin to do some of the same transforms and see what DataPrep is really capable of.
If you decide to give DataPrep a try, please click the link below. It helps support content like this, and you'll get a $100 credit with Zoho should you decide to buy.